- Print panel details on each page - if this is checked, panel
details will be printed on each layout. If unchecked, panel details
will be centralised in a report and printed at the end of the cutting
layout.
- Print cutting lines on layouts - if checked, cutting
lines will be printed on the layouts where the panel needs to be cut.
- Print full border for tables - if checked, full table
border is printed. If unchecked, tables are printed using a clear style,
rows being separated by a horizontal line.
- Display parts quantity status bar - show/hide the
"Parts quantity status bar". This status bar is situated in
the "Panels and parts" area, above the parts grid. It displays
the total of parts entered so far. This can be useful for users of Smart2DCutting
Free (30 parts), Smart2DCutting (100 parts), Smart2DCutting (1.000 parts)
and Smart2DCutting (10.000 parts)
- Priority on cutting layouts for this information
- the selected information will get higher display priority on small
parts on which the whole part information does not fit. The available
options are: Length & Width, Description and Part code.
The part number will be always displayed.
- Currency - shows the currency format currently in
use. To configure currency settings click the "Settings" button.
The "Regional and Language Options" window will open. Next,
you can simply select your country from the drop-down list or click
the "Customize" button to manually adjust the settings. Make
sure you click the "Apply" button to confirm the changes.
Please note that changing the currency will NOT perform
any currency conversion.
- Columns Order - allows to change the order of columns
in the grids. By default the columns order is: Description, Length,
Width, Qty, Material etc. To change the order of a column select it
and click the "Up" or "Down" buttons to move the
column up or down in the list. Click the "Save"
 button to close the settings dialog window and to save the change.
Certain columns can be disabled by unchecking their corresponding checkbox
in the "Columns Order" grid. A disabled column will not appear
in the program anymore until it is checked again. This can be helpful
for users who do not need the extra fields like Rotate, Part code, Notes,
Edge banding or Works.
The main columns: Description, Length, Qty, Material are required by
the program to work and can not be disabled.
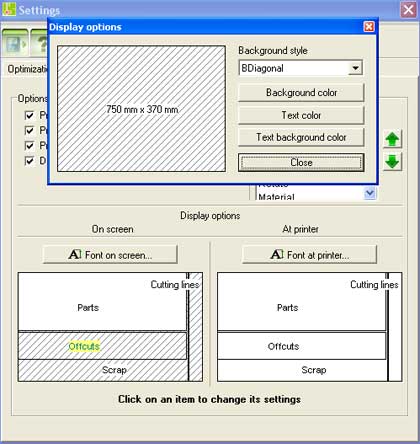
- Display Options - allows to configure the display
preferences for panels, parts, offcuts and cutting lines.
To change the cutting lines color, click on the cutting
line or on the string "cutting lines". A color selection popup
window will open, letting you choose the color of cutting lines.
To change the font on screen click the button "Font
on screen...". To change the font at printer click
the button "Font at printer...".
By clicking on any other item like "Parts", "Offcuts"
or "Scrap" the "Display options" popup opens.
|